Recently i had a requirement with salesforce’s new feature Chatter Publisher Actions. I struggled to understand what it is and how it works and finally learned it ! So making it easier for all others like me here comes my post to understand this new feature. And as Mark Benioff already announced that chatter will become primary interface for salesforce. I believe its necessary to post about it.
So it was a big paragraph? Let come directly on the point !
Chatter Actions
A new feature which allows us to create actions and they can be added on:
1.Chatter Publisher on Home Page.
2.The Chatter Tab.
3.Record Detail Pages.
Type of Actions
1.Create Actions : you can create a record on target object.
2.Custom Actions : let you define your own custom action. (Note that these are visualforce pages).
We can create actions that let user create these types of records:
Account, Campaign, Case, Contract, Contact, Custom Objects, Event (without invitees), Lead, Opportunity and Task.
These Actions can be specifically categorized as
1.Object Specific. (Supported Objects: Account, Campaign, Case, Contract, Custom Objects, Lead and Opportunity.) Remember the visualforce page you are going to bind it with Object specific action must have its standard controller of that object.
2.Global Actions: lets you create actions that are available globally .
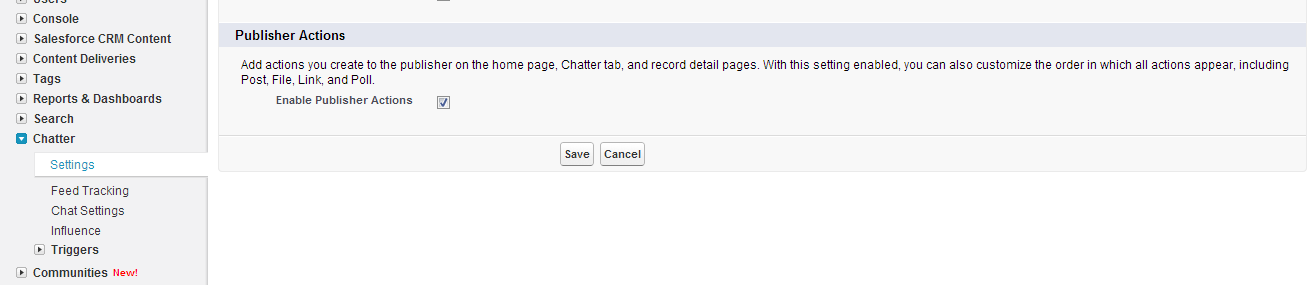
Enable Chatter Actions:
Under Chatter>Settings>Publisher Actions>Enable Publisher Actions.
Now lets take an example:
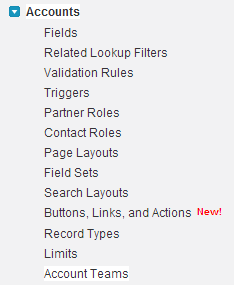
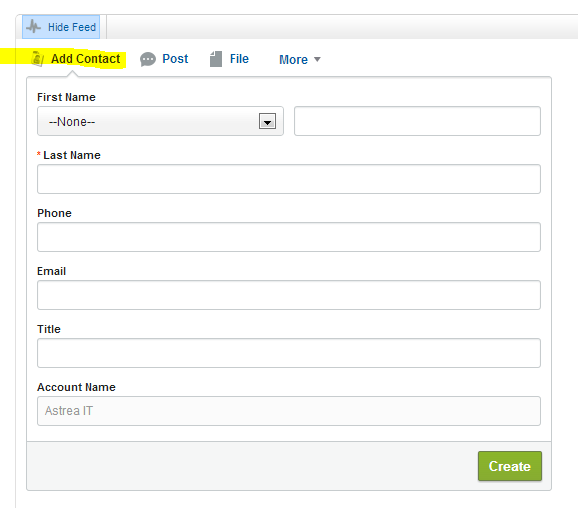
Suppose you want to add a contact record to an account record by using object specific actions
In this case your object specific action will be defined on Account.
So go under Customize>Accounts>Buttons, Links and Actions
on the next screen click on New Action
You have to define action like this :
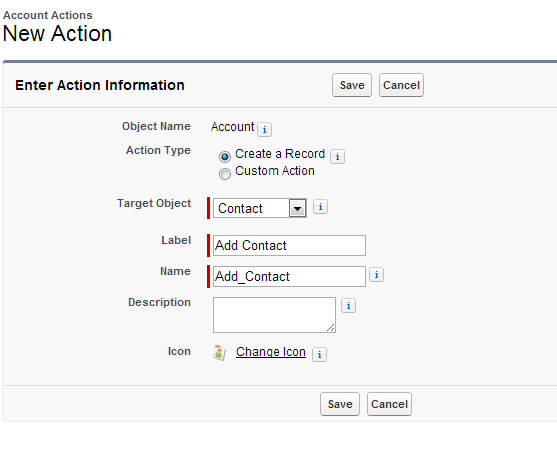
Click Save
Now comes the last part Adding this Action to Page Layout
Customize>Accounts>Page Layouts
edit Account Layout
Now you can see a additional Option as Actions
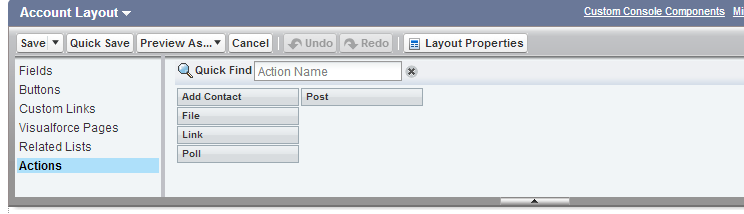
Now before dragging Add Contact Action to layout don’t forget to click on “override the global layout“.
The reason behind this is you are setting a customized list of actions for this layout and no more need the default functionality anymore.
![]()
Now drag your action
Now save this layout.
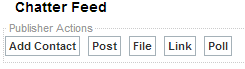
Now if there is feed enabled for accounts you will be able to see your created action like this
NOTE :If you want to use a custom action make sure you have a visualforce page that is having a standard controller for that object.At the time of defining the custom action you will see only those visualforce pages who have standard controller for that object for which you are defining the custom action.
Thank you for reading this post.